Beginner Level

I love my new InVue! One of my favorite features is the Gallery. This post is written for the Brand New users to the Software InVue. For those of you who are at the Immediate level or Advanced level, just skim though. Directions were written for InVue version 2014.1.2.0.610. on a Windows 7 platform. Directions are written with the assumption you have calibrated your machine.
I created a simple video going over the steps quickly. It can be found here. The video is intended to be viewed after the detailed directions here. If you are comfortable with simple design, than the video is probably all you need.

First, Choose the Gallery Icon. Now you can do this a few ways. For you mousy folks out there just click on the Gallery icon.

Or just press the g key! (for you Keyboard folks!)
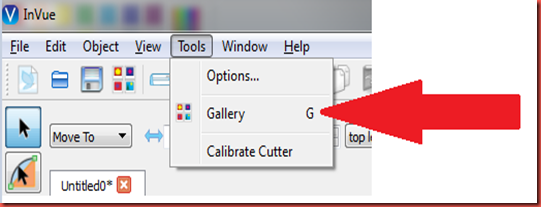
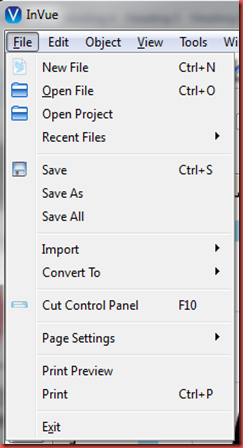
Or Choose Tools | Gallery (Yep, there are Menu folks still around!)

Now, just in case, you wondered how I knew to press the G key…..Notice the little G the red arrow is pointing to? When you see these in your menu, they are the keyboard shortcuts to the program. See all the shortcuts under the menu item File? Not all of us like keyboard short cuts, but for those of you who do….

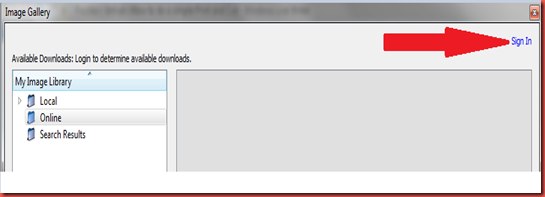
Now, That you have the gallery open
Sign in

Give me a moment to talk to the Pazzles Programmer…Please, don’t make us sign in each and everytime….can’t you remember who we are? My feelings are hurt!
Ok, back to signing in.
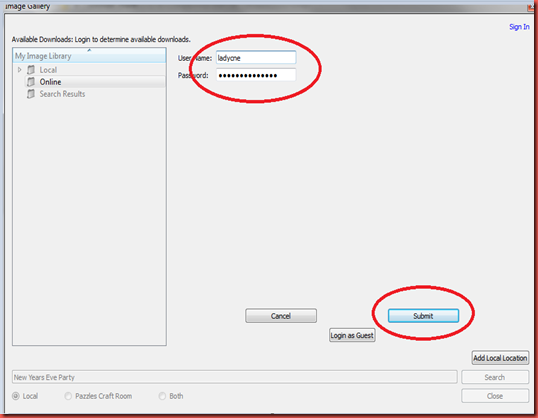
Enter your user name for the pazzles craft room and your associated password. Then choose submit

In the search field, type in New years eve party. Choose both and then click Search

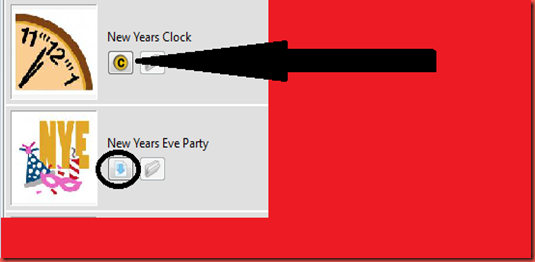
Notice the Icons for New Years Clock and New Years Eve Party are different? The Icon for New Years Clock (The yellow C) means, it’s in the craft room, not on your computer.
Now notice the icon for New Years Eve Party, it’s a blue arrow. This means, that this image lives on my computer (I have already downloaded it from the pazzles craft room).

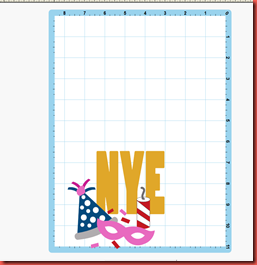
Choose New Years Eve Party and If it shows a C, choose the C. After you download the image, you will have a blue arrow. Choosing the blue arrow, will place the image on your mat. At this time, choose the blue arrow so we can work with this file.
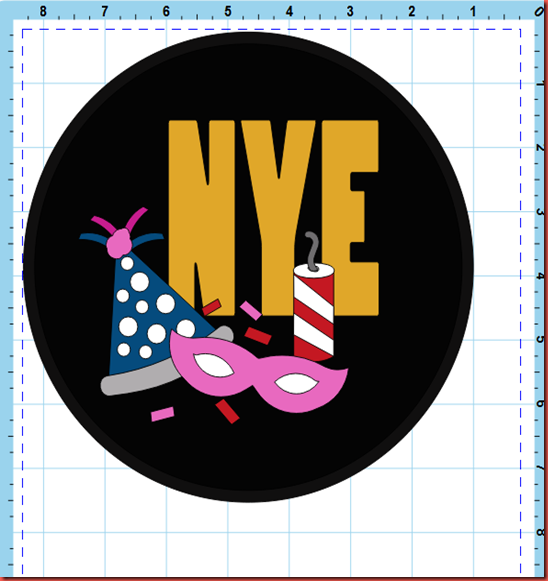
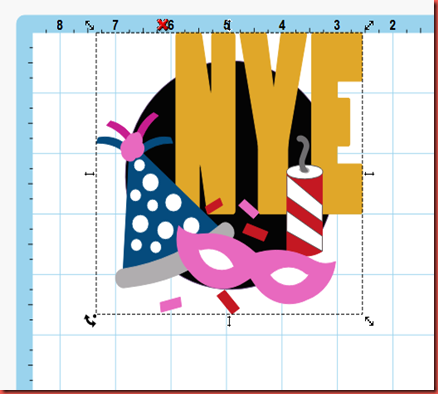
Your mat should look similar to the following image.

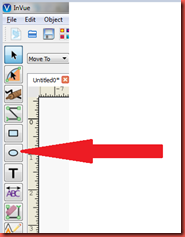
Now choose the eclipse icon from the left hand side of your screen

After choosing the eclipse icon your menu bar will change on the right hand side. Notice the Square, Circles Arrows etc? This is a dynamic tool bar that will change, as you choose things from the menu bar on the left hand side of your screen.

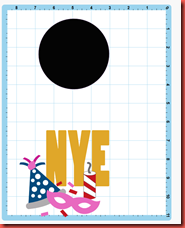
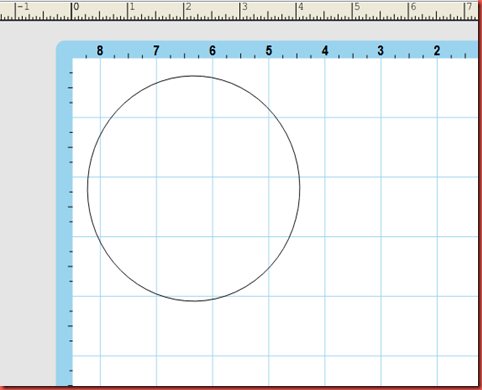
Choose the Circle and drag your mouse across the screen. Let go when you have drawn a circle drawn

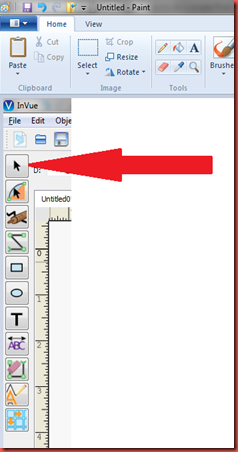
Now, if you click again, you will be drawing circles….over and over and over again  . To stop making circles, choose the select icon from your left menu bar, at the top. (the select icon is probably the most used)

Because you selected a new icon from the left menu….take a moment to notice your new menu items from the top menu bar. I am not going into all these items on this post. But if you are brand new to the software, this is a wonderful way, to get familiar with all the awesome features that it has and where they are located.

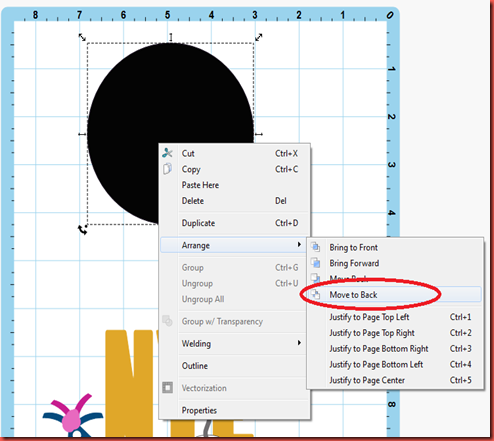
Right click your circle and choose Arrange | Move to Back

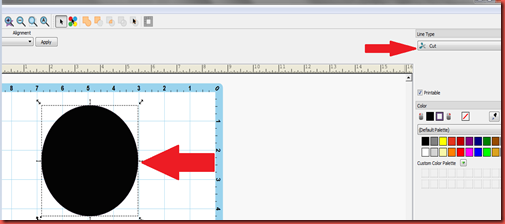
Since we are doing a print and cut, we need to pay attention to the line types. With the circle selected (notice the selection box around the circle) verify that your line type is set to Cut only. (on upper right hand side of screen). Default line type is always Cut.

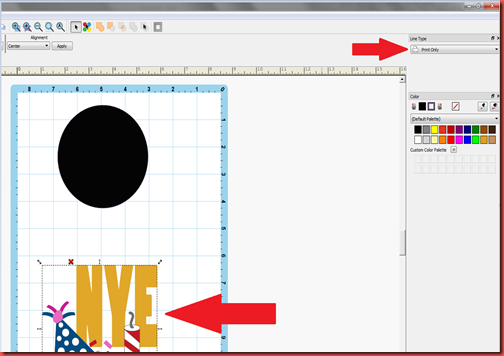
Now select your image. (Notice the selection box around the New Years Eve Image) Change your line type to Print Only. We only want to cut the circle around the image.

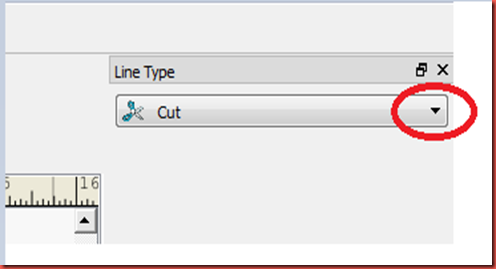
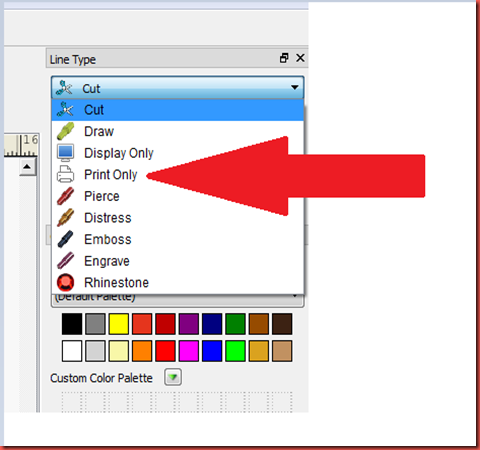
To accomplish changing the line type, choose the drop down arrow on the right hand side of Line Type

Pretty cool all those options…..We want to only Print this image, so choose print.

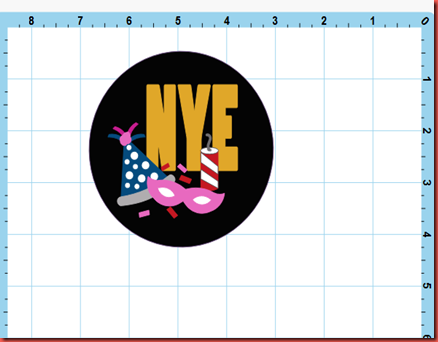
Now your screen should look like mine.

Now drag your image onto the circle.

Make your image fit inside the circle

Select everything on your page by holding the control key and the A key down. The control key says Ctrl on it and is usually located on the far left hand side of your keyboard on the left. Za
or select everything by dragging a big square around the circle and the image. you can start this big old square far away from the image…..it’s easier that way..
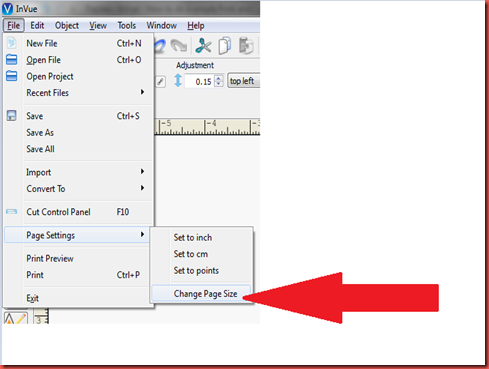
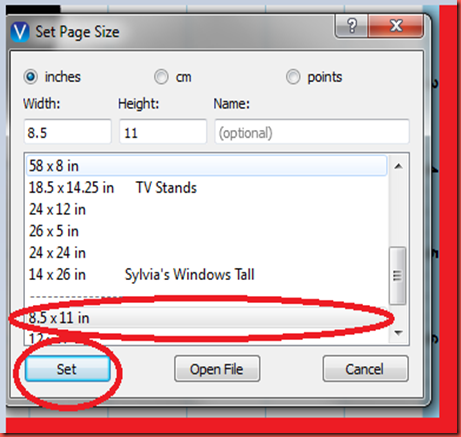
Now let’s verify that your page size is correct. Choose File | Page Settings | Change Page Size

If you need to change your page size, highlight 8.5 X 11 and then choose Set

Let’s recap right now. We found a image, we then put a border around it. We made the image print only and we made our border cut only….
Let’s verify that.
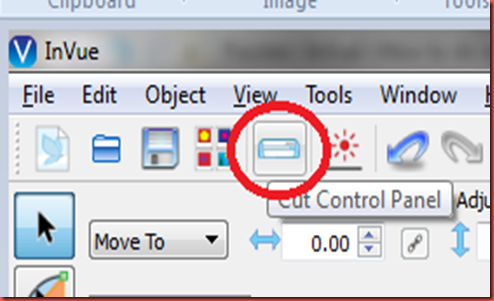
Choose the Cut Control Icon with your mouse

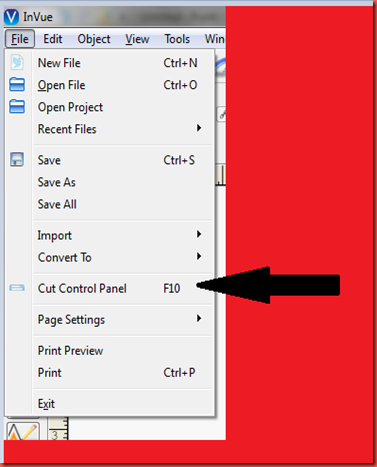
or choose the Cut Control Panel by Pressing)or by choosing from the Menu File|Cut Control
Panel

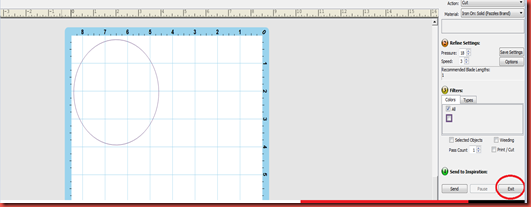
In the cut control panel, you should only see a circle. If you see the graphic image for New Years Eve Party, you need to go back and change the line style to Print only. before continuing on. This is how I double check myself to make SURE I have my line styles correct. Choose Exit from the lower right hand corner of the cut panel

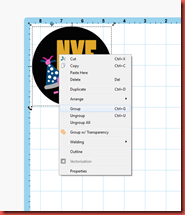
Select your image and group them together. You do this by selecting the circle and the image, then right clicking and choosing group. From now on, I am only going to give you one set of directions, I think you get the idea about the menu bar, keystrokes etc.

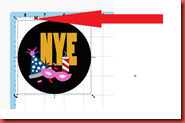
When grouped notice the color of the X changes to red

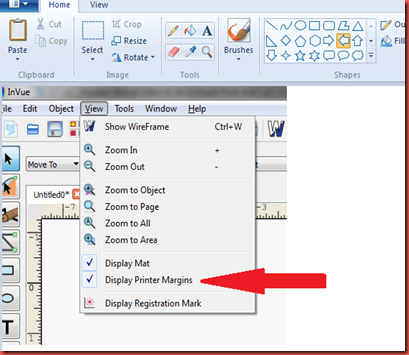
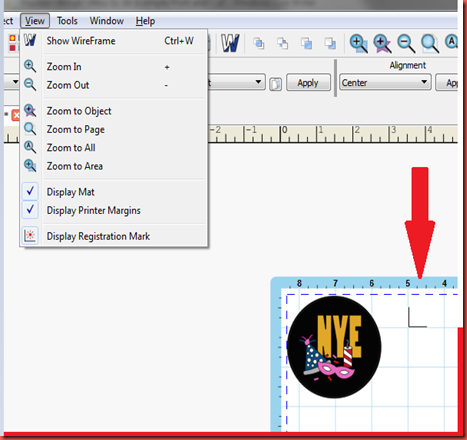
Turn on your printer margins by choosing View | Choose Display Printer Margins (if this feature is turned on, you will have a check mark…if it is turned off, the check mark will disappear).

Put your image in the upper left hand corner
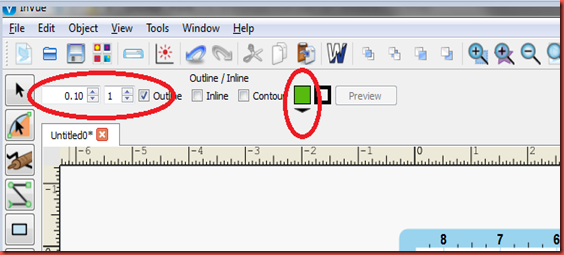
Let’s make a bleed by selecting our grouped image and choosing the outline icon from the left hand menu

Our top menu, has changed because of this selection. I have changed:
The width of the outline to 0.10.
Only 1 outline
Outline is checked
But my outline is going to be green  Choose the drop down and change to black.

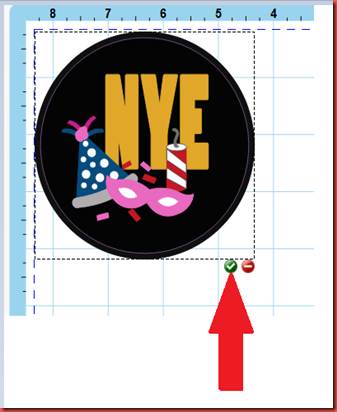
When you see your second circle choose the green arrow. By choosing the green arrow, you are saying…accept this change to my image…Yeppers, I like that outline.

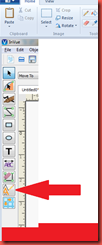
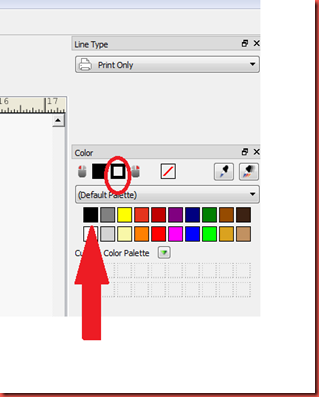
I don’t want to print this grey circle…I want that circle to be black. Select the grey circle from your image, and change the outline to black. Now, you do this by RIGHT clicking the square of black in the palette. (where the red arrow below is pointing to). Then the square box where the red circle below will change to black.

Whew….that was a thinker! Can you tell I had trouble with this? Ok back to the print and cut.
Now let’s verify our cut line.
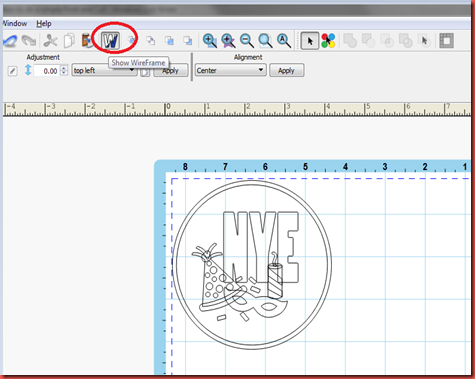
I do this in wireframe.
Choose Wireframe from your top menu

ugggg, we have to ungroup our image so select your image, right click it and choose ungroup.
The outside circle should be print only
The inside circle should be cut only
the inside images should be print only.
Notice how my cut line is NOT on the print border….now I am choosing the cut control panel and I know I have the right cut because my circle is NOT on the border! I’m ready to multiply!

Turn on your Registration Mark by choosing View | Display Registration Mark. Notice the funky L where the red arrow is pointing to?

Now you can print!
Then load that print out onto your InVue Print and Cut Mat (Mat that comes with InVue).
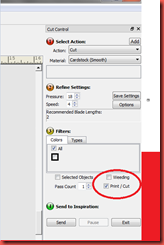
Then choose the Cut Control Panel Check Print/Cut and then Send!

Whalla!
Of course, you would probably want to size this, multiply it…etc.
Let’s recap:
- Get your image
- Make sure all line styles are set to Print only EXCEPT the outside line, (not counting the bleed line) which should be set to cut
- Make a bleed by creating a outline
- Make sure the outline line style is set to print only. NOTE to Self: the second line in from the outside is the only cut line.
- Verify Paper size is 8.5 X 11
- Turn on Registration Mark
- Print
- Load cutter with print job onto the InVue Mat
- Choose Cut Control Panel and check off Print/Cut
That’s it! Of course, you will probably want to size your image…multiply it
For those of you who need to see it, here is a simple video going over the steps. Click here.

